Aerohive setup
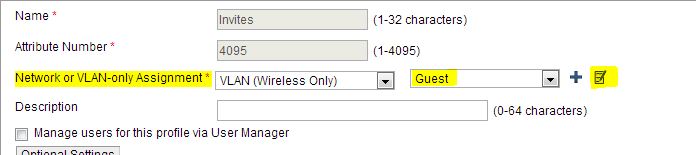
In Aerohive, we have configured a VLAN per user profile that we want to reroute. To do this, we have set a vlan for each user profile connecting to our wireless: Configuration --> Policy Configuration --> User Profiles.
Once the VLAN is assigned on Aerohive, it needs to be properly forwarded and redirected through all the switches all the way up to Fortigate unit. All traffic from this VLAN will end on Fortigate at a separate port from internal traffic effectively isolating these users from the rest of the network.
This means that Fortigate should be responsible for DHCP and DNS. But before we get there we need to make sure that Aerohive firewall allows this connection.


Fortigate setup
As I have mentioned earlier, the traffic from this special VLAN will directly arrive at Fortigate unit and is completely isolated from the rest of the network. Thus we will use a built-in features in Fortigate in order to give this users access to DHCP/DNS and maybe to our DMZ.
Port set-up
First, let's look at port setup. Go to Network --> Interface --> PortXX (where XX is the port number that will receive all the traffic).

As we can note in the picture above, we need to setup:
- the name of the port - PORT_NAME,
- a virtual domain that this port will belong to, if any
- addressing mode should be manual (default) - because our unit will be serving DHCP it cannot get an IP from someone else,
- IP/Mask should be in the same subnet as the ones in DHCP and it is the same as GatewayGuest set in Aerohive
- the only Admin Access we allow is ping, but for hardened security even this can be deactivated,
- DHCP server - enable
- set the range and the mask for IP's that can be assigned to the clients
- Default Gateway - same as interface unless you have a specific reason to set it up to something else
- DNS Server - specify the same address as the IP set in Addressing mode - this will forward all DNS requests through Fortigate and will help us redirect internal traffic directly to DMZ
- Enable device detection in Device Management - this will help us set policies per device type.
No we need to configure appropriate FireWall rules and DNS.
DNS
If the port we have configured above was assigned to a VDOM then inside VDOM look for System-->Network-->DNS Server.
First configure a DNS Database:
Back on the page of DNS configuration (System-->Network-->DNS Server), in the DNS Service on Interface create new DNS service as Recursive. It is possible that Recursive option will not be available if you haven't set-up DNS Database. In this case, you will have the only available option Forward to System DNS.
Now we need to configure our firewall rules. We will need to create at least two rules:
First configure a DNS Database:
Back on the page of DNS configuration (System-->Network-->DNS Server), in the DNS Service on Interface create new DNS service as Recursive. It is possible that Recursive option will not be available if you haven't set-up DNS Database. In this case, you will have the only available option Forward to System DNS.
FireWall
Now we need to configure our firewall rules. We will need to create at least two rules:
- A rule forwarding traffic from the port we setup above to the port connected to WLAN.
- If required, a rule forwarding traffic to DMZ.
The first rule, from our port to the WLAN should be set-up according to your internal config but the following image may help.

Since at this moment we know for sure that traffic coming for this rule is not identifiable and may never be, we can at least work with device types and provide some granular security. At the moment Fortinet offers following categories:

Similarly, if we decide to setup WebQuota categories for some or all devices, it will work per device IP address. While it is not the same as to have per user name quota it is better than having none at all.
Final thoughts: I may be adding more details to DNS setup but. for now. I hope that everyone struggling like me will have enough information to have the above described config setup on their devices.
Final thoughts: I may be adding more details to DNS setup but. for now. I hope that everyone struggling like me will have enough information to have the above described config setup on their devices.
No comments:
Post a Comment